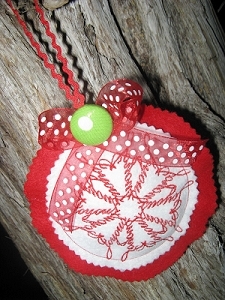
Create Christmas Felt Ornaments
By Aimee of Sew Sensible Designs
REQUIRED MATERIALS LIST:
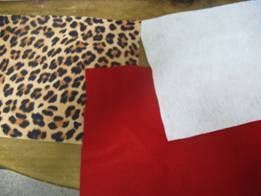
2 coordinating sheets of felt
Small rick rack to use for hanging your ornament
½” Ribbon for ornament decoration
Bag of Polyester fiberfill
Thread
Pinking fabric shears
Measuring tape / ruler
Sewing machine
Hand sewing needle
Fabric Cover Buttons Kit (can be found at local sewing/craft store)
You will only need two coordinating felt sheets. Pictured below are three because I was doing a red animal print one and a white animal print one.
1. Take out your 2 coordinating felt sheets.
2. You will be able to embroidery two designs per sheet. Hoop one of the sides. No need for stabilizer.

3. Depending on what size you want, you may want to make it smaller. I go to 9 cm.

4. Embroider design.

5. Go ahead and do a second one on other side of felt sheet before cutting first
one.

6. Trace your small circle pattern around designs.

7. Cut out circle using fabric pinking shears.

8. Trace large circle pattern on coordinating felt sheet.

9. Cut a 7” strip of small rick rack or any ribbon of your choice that you would like to hang your ornament with.

10. Fold in half and place 1” on large felt circle.

11. Place embroidered felt circle centered on large felt circle.

12. Pin small circle and rick rack strip to large circle.

13. You will topstitch around small circle.

14. Topstitch around until you get 2” from where you started.
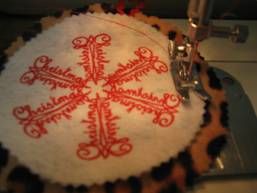
Sewing Tip: Find a spot on the presser foot and let that be your guide as you sew a circle.
15. With needle in down position, you will take a handful of Polyester Fiberfill and push it gently in the opening. Your needle is down but the ornament can still move if you don’t push the fiberfill gently. You may want to use the back of a pencil to help push it in.

16. Once you have it in, push it all the way to back so that you can flatten your circle to finish topstitching completely.

17. Cut a 10” strip of ribbon of your choice for hanging your ornament and find center.

18. Turn one side of ribbon over and place at center.

19. Turn other side of ribbon over and place on top, center, of other side.

20. Place on top of small circle centered with hanging rick rack.
 ol
ol
21. Tack in place with sewing machine with just about 3-4 stitches and then back stitch a few stitches.

22. Follow directions for your fabric covered buttons and sew that on by hand. You can also add jingle bells or regular buttons!

===================================================
In this tutorial, Aimee used the word snowflake designs by VK Digitizing. These can be found here:http://www.swakembroidery.com/info/digitizers/1039386400

Use this same technique with other designs as well!